Windows web server ---バーチャルホスト(Apache2.2.x)--- 02Feb2008 >>TOP
Apache2.2.x から設定のベースは httpd.conf で行い,種々の詳細設定は extra ディレクトリ以下のファイルで行う様になっている。Apache2で設定されている各項目をApache2.2.xのextraディレクトリに移動させたようなものであるから,移行はそんなに難しいものではないでしょう。
バーチャルホスト(仮想ホスト)設定
ここでは,IPアドレスが1つしかない場合で取得した複数ドメインを1つのサーバで動かすことを考えてみる。
たとえば,Web server PCが IP:192.168.1.102 として
ドメイン:www.sample1.jp, www.sample2.info, www.sample3.com を稼動させることを考える。
C:\usr\local\apache2\conf\httpd.conf を編集する。
以下の箇所を変更(#を削除)。
・・・・・・・・・・・・・・・・・
# User home directories
Include conf/extra/httpd-userdir.conf
・・・・・・・・・・・・・・・・・
# Virtual hosts
Include conf/extra/httpd-vhosts.conf
・・・・・・・・・・・・・・・・・
|
次に,以下のファイルを編集する。。
C:\usr\local\apache2\conf\extra\httpd-vhosts.conf
#
# Virtual Hosts
#
# If you want to maintain multiple domains/hostnames on your
# machine you can setup VirtualHost containers for them. Most configurations
# use only name-based virtual hosts so the server doesn't need to worry about
# IP addresses. This is indicated by the asterisks in the directives below.
#
# Please see the documentation at
# <URL:http://httpd.apache.org/docs/2.2/vhosts/>
# for further details before you try to setup virtual hosts.
#
# You may use the command line option '-S' to verify your virtual host
# configuration.
#
# Use name-based virtual hosting.
#
NameVirtualHost 192.168.1.102:80
#
# VirtualHost example:
# Almost any Apache directive may go into a VirtualHost container.
# The first VirtualHost section is used for all requests that do not
# match a ServerName or ServerAlias in any <VirtualHost> block.
#
<VirtualHost 192.168.1.102>
DocumentRoot /home/user1/public_html
ServerName www.sample1.jp
ServerAlias www.sample1.jp
HostNameLookups double
UseCanonicalName off
</VirtualHost>
<VirtualHost 192.168.1.102>
DocumentRoot /home/user2/public_html
ServerName www.sample2.info
ServerAlias www.sample2.info
HostNameLookups double
UseCanonicalName off
</VirtualHost>
<VirtualHost 192.168.1.102>
DocumentRoot /home/user3/public_html
ServerName www.sample3.com
ServerAlias www.sample3.com
HostNameLookups double
UseCanonicalName off
</VirtualHost>
|
コマンドプロンプトを開き,各ホスト用のディレクトリを作成。
mkdir "C:\home\user1\public_html\"
mkdir "C:\home\usre2\public_html\"
mkdir "C:\home\user3\public_html\" |
C:\usr\local\apache2\conf\extra\httpd-userdir.conf を以下の様に編集。
# Settings for user home directories
#
# Required module: mod_userdir
#
# UserDir: The name of the directory that is appended onto a user's home
# directory if a ~user request is received. Note that you must also set
# the default access control for these directories, as in the example below.
#
UserDir "public_html"
#
# Control access to UserDir directories. The following is an example
# for a site where these directories are restricted to read-only.
#
<Directory "C:/home/*/public_html">
AllowOverride FileInfo AuthConfig Limit Indexes
Options MultiViews Indexes SymLinksIfOwnerMatch IncludesNoExec
<Limit GET POST OPTIONS>
Order allow,deny
Allow from all
</Limit>
<LimitExcept GET POST OPTIONS>
Order deny,allow
Deny from all
</LimitExcept>
</Directory>
|
apache2を再起動する。
クライアント(Windows)で確認
(WindowsXP)エクスプローラを開き C:\WINDOWS\system32\drivers\etc にある hosts ファイルをテキストエディタで開いて,以下のカラーの部分を追加して保存してみる。
この設定でローカル接続でも通常のドメイン入力で3つのHPを確認することが可能になります。
# Copyright (c) 1993-1999 Microsoft Corp.
#
# This is a sample HOSTS file used by Microsoft
TCP/IP for Windows.
#
# This file contains the mappings of IP addresses
to host names. Each
# entry should be kept on an individual line.
The IP address should
# be placed in the first column followed
by the corresponding host name.
# The IP address and the host name should
be separated by at least one
# space.
#
# Additionally, comments (such as these)
may be inserted on individual
# lines or following the machine name denoted
by a '#' symbol.
#
# For example:
#
# 102.54.94.97 rhino.acme.com # source server
# 38.25.63.10 x.acme.com # x client host
127.0.0.1 localhost
192.168.1.102 www.sample1.jp www.sample2.info www.sample3.com
|
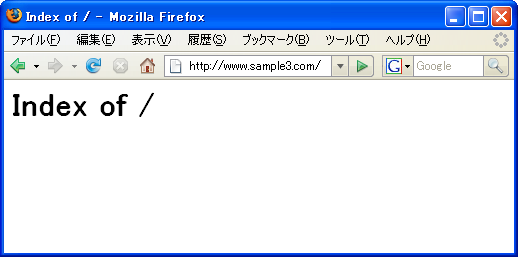
以上で設定が完了したので,ブラウザを開き動作を確認。
- www.sample1.jp にアクセス
- www.sample2.info にアクセス
- www.sample3.com にアクセス

user1 user2 user3 それぞれの public_html 以下にコンテンツを入れれば各仮想ドメイン毎 HTML 表示できるようになる。ただし,ディレクトリ内の制限が
httpd-userdir.conf で設定されているので,CGIの実行など用途に合わせて変更することになる。
メモ:
プロキシの設定がされている場合は,IE7ではブラウザのインターネットオプションの [接続] [LANの設定] [プロキシサーバ] [詳細設定] 次で始まるアドレスにはプロキシを使用しない に仮想ドメインを登録しておく。
|
|